Feeds:
Posts
Comments

Archive for February, 2012

I ate it all

Just a few years out of college, I had a job that required me to travel 90% of the time.

You read that right. 90% of the time.

I was twenty-four and jumping in and out of rental cars. I knew where to find the best-tailored suits whose wrinkles could be steamed away by a ten-minute sauna in a bathroom with a hot running shower and fogged-up mirror. I wore heels every day and never, ever ran in the airport to catch a flight. I developed a taste for “non-fat grande latte, please” and for pouring a few packs of sugar in the raw into iced coffee so each straw-sucked sip contained a tiny crunch. I learned to rely on Starbucks, but hope for anything else.

I tap danced to gain admission to a speakeasy in Milwaukee, missed a flight to see Taliesen West, and ate fresh french fries out of a vending machine in Boise. (Fried while you wait! 100% vegetable shortening!)

I drove past the Hollywood sign. I drove to Portland (Oregon) and learned for the first time the meaning of the word breathtaking. I drove from Los Angeles to San Diego and kept driving until I was mere inches from Tijuana. I drove a lot. This was pre-GPS.

As I dined in kosher restaurants in half the states across the US, the thrill of my corporate card quickly faded and I grew accustomed to the inquisitive looks, the furrowed eye brows, the slow  smile. “Just one for dinner?” Or, “Are you waiting for the rest of your party?” And, “is anyone joining you?” I usually brought a novel, the companion to solo diners everywhere. This was pre-iAnything.

I’d often look around, stare off into space, sneak peeks at the other diners, listen to snippets of conversations. And then I’d return to my book. Hoping that my food would arrive. Reveling in my expense account, I ordered an appetizer and dessert to bookend my entrée. Returning to my trusty book between courses.  In and out and back to my hotel room in less than an hour tops.

I was on the road again last week and I wrote this post sitting on a plane to Las Vegas after a quick stop in Philadelphia for a conference.

I haven’t even made it to sin city yet, but the hedonism has already begun.

Last night, I dined at Zahav.

Here’s how that evening of indulgence and decadence and intense pleasure went:

As my taxi rolled to a stop over cobblestone in the Society Hill neighborhood, I saw a soft glow from the restaurant set away from the street and perched atop a flight of stairs. The sign, its green lettering in a Hebrew-like font, let me know I had arrived.

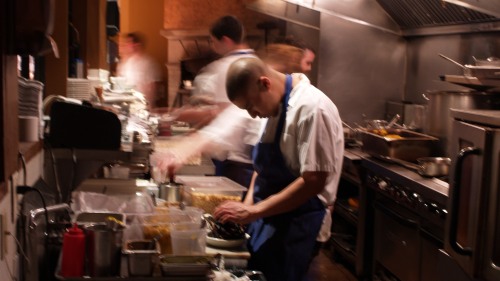
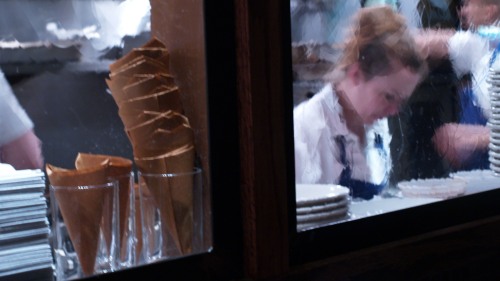
Up the stairs and into the large yet somehow intimate room dressed in Jerusalem stone, I gave my name to the hostess and asked for a seat at the bar separated from the kitchen by a thick glass window. A mix of Israeli and reggae music played in the background. Just moments after settling onto my stool, I snuck out my not-so-inconspicuous camera and snapped a few shots through the glass, past stacks of dishes and bowls, to capture the action. Catching the eye of one of the cooks, I shyly smiled and shrugged, embarrassed that I was invading her space. She smiled back and shrugged too, welcoming me into her world.

Gaining courage, I kneeled on my stool, my face hidden from view by the rapidly clicking camera. When my waitress approached with the menu, I scrambled down, nearly falling off the stool.

She set before me a small dish of olives and pickles and a plate of za’atar, harissa, and schug to “season each of your dishes, as you like,” and explained that the food at Zahav is inspired by Israel and the Middle East but is far from traditional. “If you see something – like kugel – on the menu that you’ve eaten before, you probably won’t recognize our version.”

A few minutes staring at the menu with glazed-over eyes, I settled on the Tayim tasting menu (tayim means tasty in Hebrew) and selected my dishes guided by the recommendations of a friend who had eaten at Zahav the week before.

I started with a glass of Cinsault  from Lebanon’s Bekaa valley (Chateau Mussar Cuvee Jeune, 2009) and a mint-flecked limonana.

A few minutes later, I scorched my fingertips tearing off a piece of still-steaming laffa, rolled up to preserve its heat. I pinched the laffa into the butter-swirled Turkish hummus in a pan too hot to touch.

I plucked from my tower of salatim each of the eight (eight!) cold salads. I started with spicy Moroccan carrots. Then cooling cucumbers. And a sip of wine. A piece of laffa spread with twice-baked eggplant. A spoon of taboule with huckleberries. A slurp of limonanna. A pinch of hummus. A spoon of beet salad. A bite of naked laffa.

I was dizzy by the time I reached salads six, seven, and eight.

I chatted with the waiters and waitresses, the manager, the hostess, the guy manning the fire-breathing oven.  One of the waitresses asked if I wanted to come back into the kitchen.

I looked at her and all I could say was !!!!!!!

She led me around the corner, through the back prep kitchen, and dropped me off in front of the hearth. I watched an entire tray of dough systematically rolled out, slid into the mouth of the hearth, puffed and bubbled and crisped to perfection, wrapped around tongs, and laid down next to bowls of hummus resting on small squares of Israeli newspaper.

I watched “the new guy” working the line on his first night, having only started in the kitchen mere hours before I arrived. The other chefs patiently directing him, correcting him. He joked that I had as much right to be in that kitchen as he did. I blushed. And a small part of me hoped that, like him, I belonged.

I chatted up the woman manning the grill, as people passed from the prep kitchen to the front kitchen, bearing more trays of soft laffa dough and metal containers of sliced vegetables.

I followed plates and bowls as they moved down the counter in a procession: a smear of sauce, a scoop of grains, a sprinkle of vegetable, a gleaming protein. I watched the delicate choreography of cooks, calm yet quick, turning from counter to oven to counter again.

Stomach grumbling, I went back to my stool, my blue napkin folded neatly into a pyramid next to my fork and knife.

Within minutes, my mezze arrived. Each was a party of opposites – savory and sweet, crunchy and smooth – an adventure in every mouthful. First, a plate of delicate orange persimmon slices sprinkled with crumbled not-too-salty feta, thinly sliced radish, and olive tapenade. Next, cauliflower fried to a golden brown scattered over a green pool of labne with chive, dill, mint, and garlic.

As I lifted my first glistening forkful of persimmon, I was surprised by a third dish, delivered “compliments of the chef.” Small cubes of crispy haloumi cheese surrounded by roasted squash, date purée, and lemon-tinged apple matchsticks.

I cleared my plate. Well, plates. And watched as my al ha’esh – a skewer grilled “over the fire” – approached. It was a landscape of trumpet mushrooms over couscous, covered with a fried egg trimmed into a perfect circle.

Halfway through the mushrooms, another bowl arrived with a few bites of that evening’s specialty grilled dish. And another glass of wine.

Finally, dessert and coffee. I ordered the kataifi – crispy threads of phylo wrapped around Valrhona chocolate and topped with mango.

Topped also with labneh ice cream. This ice cream deserves its own sentence. Perhaps its own paragraph. It was a slightly sour, slightly sweet, creamy delight that coated my palate in sheer delicious.

Deeply sated, I wandered around the restaurant, sneaking peeks at the other diners and their dishes, eavesdropping on snippets of conversation. Checking out the kitchen from the other side of the bar, chatting with the waiters and waitresses again. Not wanting the evening to end. Despite having finished my meal.

I returned to my stool for my last sips of now-cool coffee and found my blue napkin again folded into a pyramid and placed next to a final gift from the kitchen. A second dessert. Semifreddo – light airy caramel ice cream sandwiched between two crisp pistachio cookies in a pool of cherry and topped with a dab of dulce de leche.

In case you’re counting, that was eight salatim, one hummus, one laffa, three mezze, one and a half al ha’esh main courses, and two desserts.

And I ate it. I ate it all.

The  novel I carried never made it out of my purse. My dining companion was Zahav – the restaurant, the food, the staff, the atmosphere. I felt a little bit like family.

Zahav:  237 Saint James Place  Philadelphia, PA 19106

Note: Zahav is not a kosher restaurant, however they refrain from cooking pork, shellfish, or meat and dairy in the same dish.

Read Full Post »

behind the scene

I just got back from several days in Vegas. In the midst of this spectacle of a city, I  found myself drawn to the scenes behind the scene.

Read Full Post »

our handiwork

For the past two Tuesdays, I’ve left the office early, made a mad dash through  Harvard Square and up Mass Ave, searched for a parking spot, and stood at a long table in a hot room with a bunch of strangers. It’s an exhausting end to a full day at work, but after the first week, I was ready. I brought a pair of ballet flats to change into. I wore a short sleeve dress. I mentally prepared myself to be patient.

Week two was tarts and pies. We skipped the food processor in favor of our hands.

There was squishing cold butter and flour between fingers and crumbling it into little pieces. There was scooping and tossing sandy dough with fingertips to mix it with water. There was pushing dough with heels of hands and smearing it across the counter.

I let my mind wander. I let my hands feel. I let my day slip away.

There was banter as my neighbors and I got to know each other while working the dough and making sure not to overwork it. We checked out each other’s progress, comparing doughs as they just  barely came together. We wrapped up dough and piled parcels into the refrigerator.

There was slicing and stirring and whipping and melting and tasting while doughs chilled and we made fillings.

There was pushing and pulling of French rolling pins, sliding of palms over tapered ends as dough flattened and thinned across the floured counter.

There was divvying up of tart pans and cutting up of dough. There was light pressing of dough into the slides of pans. There was rolling of pins across edges of pans and trimming of excess dough.

There were rogue pie weights to chase as they spun out of reach.

There were tart crusts to check in the hot oven. There were fillings to fill and filled tarts to bake.

We admired our handiwork.

Then I got a parking ticket.

Pâte brisée (short pastry) by hand

The key to makng a flaky crust is to start with very cold ingredients, to not overwork the dough, and to not add too much liquid. I love all the French terminology, so you may find a few quick French lessons thrown into the recipe.

This recipe makes one tart/pie crust. If you are making a double crust pie, you’ll need to double this recipe.

– 1 1/2 C flour

– 1/8 t salt

– 4 ounces (8 T) unsalted butter

– 3-4 T ice water

Combine. Combine the flour and salt on the countertop.

Cut. Weigh or measure the very cold butter. Cut it into 1-inch cubes.

Pinch. Place the butter on the counter and cover it with the flour-salt mix. Pinch and gently smush the butter into the flour until you get pea-sized pieces. 

Sabler. Sabler means to reduce into sand. (Sable is sand and French sables are crumbly cookies such as pecan sandies.) Cut into the butter flour mixture with a bench scraper until it resembles sand.

Papillon. A papillon is a butterfly. Spread the sandy mixture into a long rectangle and form a trough down the center. Drip a tablespoon of water all along the trough, and then with your fingers spread, fluff and flutter the sand into the center to gently incorporate it into the water. Using a bench scraper, gather the forming dough and repeat the papillon step a tablespoon of water at a time. The dough will start to come together in shaggy pieces. The dough is ready when you squeeze it and it sticks together. Don’t add too much water, or when you bake the dough, it will shrink down and away from the tart pan sides and your tart will be too shallow. Weather will affect the dough – if it’s humid, add less water.

Fraisage. Gather the dough together into a pile, and then with the palm of your hand, push it away from you against the counter a few times. The etymology of  fraisage is a little complicated, but here’s my best attempt. The non-cooking definition of fraisage is the act of drilling. The verb fraiser means to sheer. Though it’s spelled differently, I’m convinced that fraiser (and therefore fraisage)) s related to the shear forces of physics. Remember your physics? I remembered just  barely enough to look up the phrase. Essentially shearing is the deformation of a material in which parallel surfaces slide past each other. So, you push the pâte with the heel of your hand, and the flour and butter slide past each other. When I did this, I could imagine the layers of  flakiness starting to form. Check out the second picture – you can see distinct flaky layers on the front left edge of the tart.

Chill. Gather the dough together and press it into a disc (about an inch thick). Wrap in plastic and chill for at least 30 minutes.

Roll. Lightly flour the counter. Place the disc of cold dough on the counter and using a large rolling-pin, push the dough away from you, pull it towards you, and then turn the dough 90 degrees. Repeat the push-pull-turn combo until you’ve rolled the dough out into a circle 1/8-inch thick.

Cut. Place a tart or pie pan on the rolled-out dough and use a sharp knife to cut out a circle (or whatever shape your pan is) an inch from the pan edge for a tart or two inches for a deep-dish pie. You want to make sure that the dough will be large enough to go up the sides of the pan.

Press. Lift the dough and place it on top of the pan. Gently press it into the corners and up the edges. Roll a rolling-pin across the top of the pan to trim off the excess dough.

Chill. Chill the pan in the refrigerator for 1 hour or the freezer for 15 minutes.

Blind bake. Preheat oven to 425ºF. Prick the chilled dough all over with a fork, cover it with parchment paper and then fill the pan with pie weights. Bake for 10-15 minutes. Carefully remove the hot pie weights and parchment, and continue to bake for another 5 minutes until the crust is light golden.

Reduce heat. Lower the oven to 350ºF.

Fill. Fill the crust with whatever filling you’re using.

Bake. Bake for 30-45 minutes (will vary from filling to filling).

 Pear and dried cherry tart

After blind-baking a pâte brisée crust, fill it with this pear and dried tart cherry combination. This tart is not particularly sweet and the addition of rosemary provides a savory note. A friend of mine called it a  sophisticated, subtle, and grown-up  tart.

6 firm ripe Bosc pears

– 1 1/2 C dried tart cherries

– 1/2 C light brown sugar

– 3-4 sprigs fresh rosemary (1 t chopped)

– 2 T lemon juice

– 1 T cornstarch

Preheat. Preheat the oven to 425ºF.

Cut. Peel and core the pears and cut them into 1/2-inch pieces. Chop the rosemary leaves very finely.

Cook. Cook the pears, cherries, brown sugar, and rosemary in a pot over moderate heat, stirring frequently. It should take about 20 minutes until the pears are tender.

Thicken. Whisk together the lemon juice and cornstarch in a small cup. Then stir into the cooked pear mixture and bring to a boil for about 1 minute until the mix thickens.

Cool. Let the fruit cool before adding to the tart crust.

Prepare tart crust. Make, roll, and blind bake a tart at 425ºF for 15 minutes. Remove the pie weights and bake for another 5 minutes.

Fill. Fill the tart crust with the cooled fruit.

Bake. Lower the oven to 350ºF. Bake the tart for 30-40 minutes.

Read Full Post »

You’ll never guess what I did.

No, really. Guess.

I threw a Superbowl party last weekend.

Correction. I offered up my apartment and TV to a few friends who were throwing a Superbowl party. If you want to throw a party, this is the way to do it. The original hosts organized. They brought salad and quesedillas and guacamole and vegetables and dip and beer and rice krispies treats. They brought paper plates. They told me not to make anything.

I tried. I really tried not to make anything.

But I couldn’t resist the draw of the oven and the promise of chocolate chips. So a few minutes before everyone showed up, I started whipping together a dessert.

Correction, whipping is an exaggeration. I did indeed start the recipe with an whisk, but quickly switched over to a spoon. This is a one pot, one bowl deal. The pot is for browned butter. The bowl is for whipping up, I mean mixing up, the blondies. You could even keep your pot hung up on its rack and melt the butter in the microwave instead of browning it. But I’d advise against it. And if I’m telling you to clean an extra pot, you know I’m serious.

Everyone arrived to the nutty scent of browning butter.

As the coats were hung and the table was set, the butter cooled and the oven pre-heated.

During kickoff, I held the glass bowl against my stomach and whisked the butter and sugar together. Then I set the bowl down to watch the first few plays.

In stolen moments between the game and the start of the first commercial, I snuck into the kitchen to switch to a wooden spoon and drop in the vanilla and egg.

A few more plays, a few more turns of the spoon, a few more seconds before a few more commercials, and I added the rest of the dry ingredients.

Back to the living room, I sat on the sofa and continued to stir, watching the game unfold. A fine layer of flour settled on my guests and sofa.

Back to the kitchen, a few handfuls of chocolate chips, a few more stirs, and into the pan and into the oven.

Out of the oven, the blondies stayed in the kitchen during the halftime show.

They made their appearance during the second half. They made their disappearance during the second half.

It was a sad day for the Pats, especially for the fans at a party that was half inhabited by Giants. It was all very civil, no brawls to break up.

When the game was over, we gathered the trash and packed up the leftovers and wiped down the remaining blondie crumbs spread across the table.

Brown butter blondies

I believe I have found the best blondie recipe in the world. And then, risking hubris, I bested it just a touch by browning the butter. The original recipe is from Garrett McCord’s blog Vanilla Garlic. I discovered it in a roundabout way when looking for an easy lemon dessert. I took a lemon mascarpone blondie recipe, contributed by Garrett to Elise Bauer’s Simply Recipes, cheated by using bottled lemon juice instead of freshly squeezed, and baked it in a tart pan. While looking at that recipe, I clicked on a link to Garrett’s base blondie recipe and flagged it for future reference. I’ve been making the blondies ever since, and got the idea to brown the butter from the only brownies worth making from scratch.

UPDATE 1/20/17: You don’t even need a bowl! Brown your butter in a pot big enough to hold the rest of the ingredients and just mix everything up in the pot. Also, line your pan with aluminum foil so that once the blondies cool, you can just lift the whole thing out for much easier cutting. 

Makes 16 blondies.

– 1/2 C butter

– 1 C tightly packed dark brown sugar

– 1 egg

– 2 t vanilla

– 1/2 t baking powder

– 1/8 t baking soda

– pinch of salt

– 1 C flour

– 1/2 C milk chocolate chips

Prep. Preheat the oven to 350°F. Butter and flour an 8X8 pan.

Brown. Heat the butter in a small sauce pan over medium low heat. After it has melted, it will froth and the solids will start to brown. You’ll be able to scrape up the brown  bits with a spoon. Once the butter starts to smell nutty and the liquid butter turns a dark golden brown, it’s ready. This takes about 10 minutes. Cool the butter to room temperature.

Whisk. Whisk the cooled brown butter and sugar in a bowl. Add the egg and vanilla extract and keep whisking.

Stir. Stir in the flour, baking soda, baking powder, and salt until incorporated. Mix in the chocolate chips. The batter will be quite thick.

Bake. Spoon the batter into the prepared pan and spread it out evenly. Bake for 20-25 minutes or until a toothpick comes out clean.

Cut. When the blondies are cool, flip them out onto a cutting  board. Using a big chef’s knife or a pizza wheel, cut the blondies into 16 2X2 squares.

Read Full Post »

here we go

I’m taking another course! Last time was six weeks of cooking. This time, we’re baking.

I can fairly confidently call myself a cooker. But a baker? Not so much.

Sure, I bake. But serious baking takes patience. I take shortcuts. Baking needs precision. I need to taste and modify as I go. Baking requires a scale. I require … oh wait, I do indeed have a scale.

Well then, I guess I shall try to be a serious baker.

Here we go … let’s talk about serious baking.

Our first class was on pâte à choux.

What? You don’t know what that is? Let me give you a hint.

Need another hint? You fill them with crème pâtissière.

Then you cover them with chocolate.

Éclairs. Éclairs! We made éclairs!

Need another look?

I thought so.

Pictures aside, let’s get down to business.

Pâte à choux is cream puff dough which is the base for cream puffs (duh), éclairs, profiteroles (cream puffs that you fill with ice cream instead of pastry cream and drizzle with chocolate), and gougères (savory cheese puffs).

The main leavening agent in pâte à choux is steam, created by the high moisture content in the dough. You bring a water and butter mixture to a boil before adding flour – boiling ensures that the flour expands to accept all the liquid. But quick, you don’t want the water to boil for too long or you’ll lose some of that moisture, so you have to whip it off the stove the moment it starts to boil. You stir and beat the flour into the dough to strengthen the gluten structure which gives the dough a lot of elasticity. You bake the pâte in a very hot oven so that the steam puffs up the pastry, and then lower the temperature to let the puffs dry out a bit (you don’t want a wet center). When you take the puffs out, you poke a few holes in them to let steam escape and to help them keep drying out as they cool.

The attention to detail here made my head spin.

Here are a few mistakes that you don’t want to make:

– Don’t forget to stir the dough continuously on the stove top.

– Don’t add warm half-and-half to the pâte à choux dough instead of to the pastry cream.

– Don’t scare your baking partners by adding a large pinch of salt instead of a half teaspoon. (They gasped!)

– Don’t get air in your pastry bag.

Oy. Can you tell it was a long night?

By the way, do you know why the dough is called choux? Choux means cabbage  (plural) in French and that’s what my baking partners’ little cream puffs looked like. Want to know something else about choux? A French mother might call her child “mon petit chou” – my little cabbage – when he’s behaving and cute as a button. Probably when he’s asleep like a doll and she’s showing him off to her neighbors.

Look at all mes petits choux!

Pâte à choux master recipe

We made the pâte à choux by hand, but you can cheat and use your mixer if you have one. If you don’t have a pastry bag, use a ziplock bag snipped at a corner to pipe the pastry dough onto a cookie sheet and then a turkey baster to fill the pastries with crème pâtissière.

Makes about 16 small éclairs or 3 dozen small cream puffs.

– 1 C cold water

– 8 T unsalted butter – at room temperature

– 1/2 t salt

– 1 C flour

– 4 eggs

– Optional: 1 egg for eggwash

Boil. Add water, butter, and salt to a large saucepan (you’ll be adding flour to it) and heat over moderate heat until the water comes to a boil. Once it boils, remove the pan from the heat quickly.  At this point, the butter should be just melted. If the water boils before the butter melts and there are lumps of butter, take the pan off the heat and wait for the butter to melt.  Essentially, you don’t want to lose too much moisture by leaving the pan on the heat longer than necessary.

Mix. When you’ve removed the pan from the heat, add all of the flour at once. Stir the mixture with a wooden spoon until it has the consistency of mashed potatoes. Then return the pan to medium heat and stir vigorously to dry out the pastry. This takes about 5 minutes. When you stir, be sure to scape the bottom and sides of the pot. When it has dried out enough, the dough will be a shiny mass that small beads of butter will be on the surface of the pan (the pan will look like it’s sweating). When you stick a finger into the dough, a tiny bit of butter will pool in the depression.  At this point, remove the pan from the heat and let cool slightly.

Keep mixing. Transfer the dough to a large bowl (or the bowl of your mixer) and beat in eggs one at a time. The texture will change dramatically. After the first egg, it will separate into strands. Continue adding each eggs and the dough will start to become more cohesive. With the last egg, the dough will sling to the sides of the pan or bowl and whatever you’re using to mix. If it’s not,  you might need to add a little more egg.

Store. You can pipe the dough immediately (see  below) or cover the surface closely with plastic wrap so that it doesn’t form a skin like pudding. You can keep it at room temperature for a few  hours, in the refrigerator for 3-4 days, or in the freezer for up to 4 months. If you are going to freeze the dough, pipe the dough into whatever shape you want, freeze, and then store in a ziplock bag.

Pipe. Line a cookie sheet with parchment (spray the pan with a tiny bit of oil so the parchment sticks. Fit a pastry bag with a large round tip (#9 or 3/4-inch) and then fill it with pâte à choux dough. Hold the tip very close to the parchment, twist the end of the bag, grip the twisted part between your thumb and forefinger, and then use your other fingers to squeeze gently from the end (sort of like toothpaste) to form strips 2-4 inches long for éclairs or round puffs for cream puffs. Use a little water on your fingers to smooth out any mistakes.

Optional: brush. If you are not going to cover your puffs with anything (chocolate, glaze, etc.), use a pastry brush to lightly coat the tops of the pastry with a beaten egg. Don’t let the egg pool around the edges of the dough or it will stick and make it more difficulty for the pastry to puff.

Bake. Preheat the oven to 475º. Place the pan in the oven and immediately drop the heat down to 375ºF. Bake pastries until puffed by double, golden brown, and firm to the touch: 20-25 minutes for éclairs 0r 30-35 minutes for cream puffs. Then drop the temperature again to 300ºF and bake until the pastries completely dry out: another 20 minutes for the éclairs or 10-15 minutes for cream puffs. Remove the pan from the oven and use a toothpick to poke a hole in each end of the éclairs or at the bottom of the cream puffs, move it around a bit to expand the opening,  and cool completely on a rack. Poking the holes helps the pastries to completely dry out.

Fill. Fit a pastry bag with a small tip and fill the bag with pastry cream (recipe below). Twist the end of the bag and, like with piping, squeeze gently from the end to fill the éclairs or cream puffs in the holes you made earlier.

Enrobe. Dip the filled éclairs or cream puffs into the chocolate glaze (recipe below).

Crème pâtissière (pastry cream)

Makes 2 ½ cups

– 1 ¾ C half-and-half

– 1 t vanilla

– 4 egg yolks

– 1/2  sugar

– 1/3 C flour

– pinch of salt

– 1 C cream

Heat. Warm up the half-and-half in a saucepan over low heat (don’t let it bubble or boil). Remove pan from heat.

Mix. Whip the egg yolks and sugar in a bowl until very thick and pale yellow. This can easily take up to 10 minutes! Stir in the flour and salt. Very gradually, add the warm half-and-half to the yolk mixture, stirring with a whisk.

Cook. Transfer the mix into a saucepan. Cook over medium-low heat, stirring continuously with a wooden spoon. When the mixture starts to bubble, lower heat slightly and continue stirring for 1-2 minutes. Remove from heat and add vanilla.

Strain. Using a single mesh strainer, strain the cream into a bowl.

Cool. Cover the cream with plastic wrap, placing the plastic right up against the surface of the  cream to avoid the cream forming a skin. Poke a few holes in the plastic wrap to allow steam to escape. refrigerate until cold — this takes about 30 minutes.

Whip. Whip the cream. Fold it into the pastry cream.

Chocolate glaze.

– 4 oz sem-sweet (~55%) or bittersweet (~70%) chocolate

– 1 t vegetable shortening (we used Crisco)

– 1 T corn syrup

Melt. Using a serrated knife, shave the chocolate and put it into a bowl. Fill a small pot with about an inch of water and put over medium heat. Place the bowl on top of the pot, making sure that the bottom of the bowl doesn’t touch the water. Once about half of the chocolate has melted, remove the bowl from the pot.

Stir. Stir the chocolate until it has completely melted. Add the shortening and corn syrup and continue to stir. Let the chocolate cool until it reaches the desired consistency. I found it easiest to dip the puffs into the chocolate when it was lukewarm.

Read Full Post »

thank you

Where to begin?

Thank you.

Thank you to my family.

Thank you to the friends who voted and recruited their frends to vote, and their friends’ friends.

Thank you to the colleagues who, when our network blocked them from voting, voted from their home computers, BlackBerries, and iPhones.

Thank you to the loyal readers who found me in the early days and stayed close while I fought my way out of crappy and embarrassing photos.

Thank you to those who serve as inspiration and muse for my cooking, recipes, and writing.

Thank you to the complete strangers who discovered Kosher Camembert through Joy of Kosher’s best kosher food blog contest and enjoyed it enough to vote.

Until I can send each and every one of you these almond and orange croquants (my lucky officemates … you were the first recipients), please accept my gratitude with this recipe.

Almond and orange croquants

Croquants are crispy French almond cookies, normally very sweet and merengue-based. I found a recipe for ones that are similar in shape and texture to biscotti on the blog that inspired me to start this one. If you like biscotti, check out these almond and chocolate ones. These croquants are not too sweet with almonds that are well toasted and only 1 ½ cups of sugar to 4 cups flour. The original recipe calls for half white whole wheat flour, but I prefer to only use all-purpose. If you taste the raw dough, it will taste a little bitter – don’t worry — this is from the orange blossom water and it mellows during baking.

Makes about 4 dozen.

– 12 ounces whole raw almonds (approximately 2 ½ cups)

– 4 C all-purpose flour (or use a scale to measure out 500 g flour) or 2 C all-purpose and 2 C white whole wheat flours

– 1 ½ C sugar

– 1 t baking powder

– ½ t kosher salt

– 2 large eggs

– 2 T orange blossom water

– 1 orange for zest

– approximately ½ C cold water

– optional: sugar in the raw ( also called “turbinado” or “demerara”) and fleur de sel (or kosher salt)

Preheat. Preheat the oven to 350°F.

Toast. Spread the almonds in a single layer on a cookie sheets. Toast in the oven for about 15 minutes. They’re ready when the scent of almonds wafts over from the kitchen. When you take them out of the oven, the inside should  be light brown and the skins should start to crackle as the nuts cool.

Mix. In a large mixing bowl, combine flour, sugar, and salt (I used my stand mixer). Add eggs one at a time, orange blossom water, and orange zest and incorporate. At this point, the mixture will be very crumbly and will not yet come together. Add the cold water, 2 tablespoons at a time, and mix until the dough comes together. Gently stir in cooled almonds.

Shape. Cover a cookie sheet with parchment paper. Shape the dough into 2 or 3 long loaves on the parchment. The dough will be sticky – just go with it. I typically make the logs about 3 inches wide. You can make them wider, but make sure to leave enough room between the two loaves to allow them to spread without touching.

Sprinkle. Wet your hands and slide them over the loaves to smooth out the sticky dough. Sprinkle lightly with kosher salt and sugar in the raw.

Bake. Bake the loaves for 30-40 minutes. I set my timer for 30 minutes and then check the loaves every few minutes . They are ready when the dough sets and turns golden brown.

Cool slightly. Remove the loaves from the parchment (they should come off pretty easily) and cool for 5-10 minutes. If you let them cool for too long, they’ll be too hard to slice.

Lower temperature. Lower the oven to 225ºF.

Slice. Slice the still-warm loaves diagonally into skinny slices, about 1-2 cm (or 1/2 inch) wide.

Bake again. Lay the slices on a cooling rack and place the rack directly in the oven. This will allow the croquants to crisp evenly. Or, spread the slices out on your cookie sheet and flip them over half way through the second baking. Bake again for 20-25 minutes.

Store. Let the cookies cool and then store in an airtight tin. You can always crisp them up a bit on low heat in a toaster oven.

Read Full Post »