I went to Israel on Friday!
Ok, it was just an hour. And it was over Zoom. But the challah workshop I attended truly, truly transported me to Mattat in the Galilee, to the kitchen and garden of Erez Komarovsky. Guided by my friend (and Sababa author) Adeena Sussman and hosted by The Jewish Food Society, dozens of us worldwide baked wild spring challah alongside Erez, whom Adeena calls the godfather of artisanal baking in Israel.

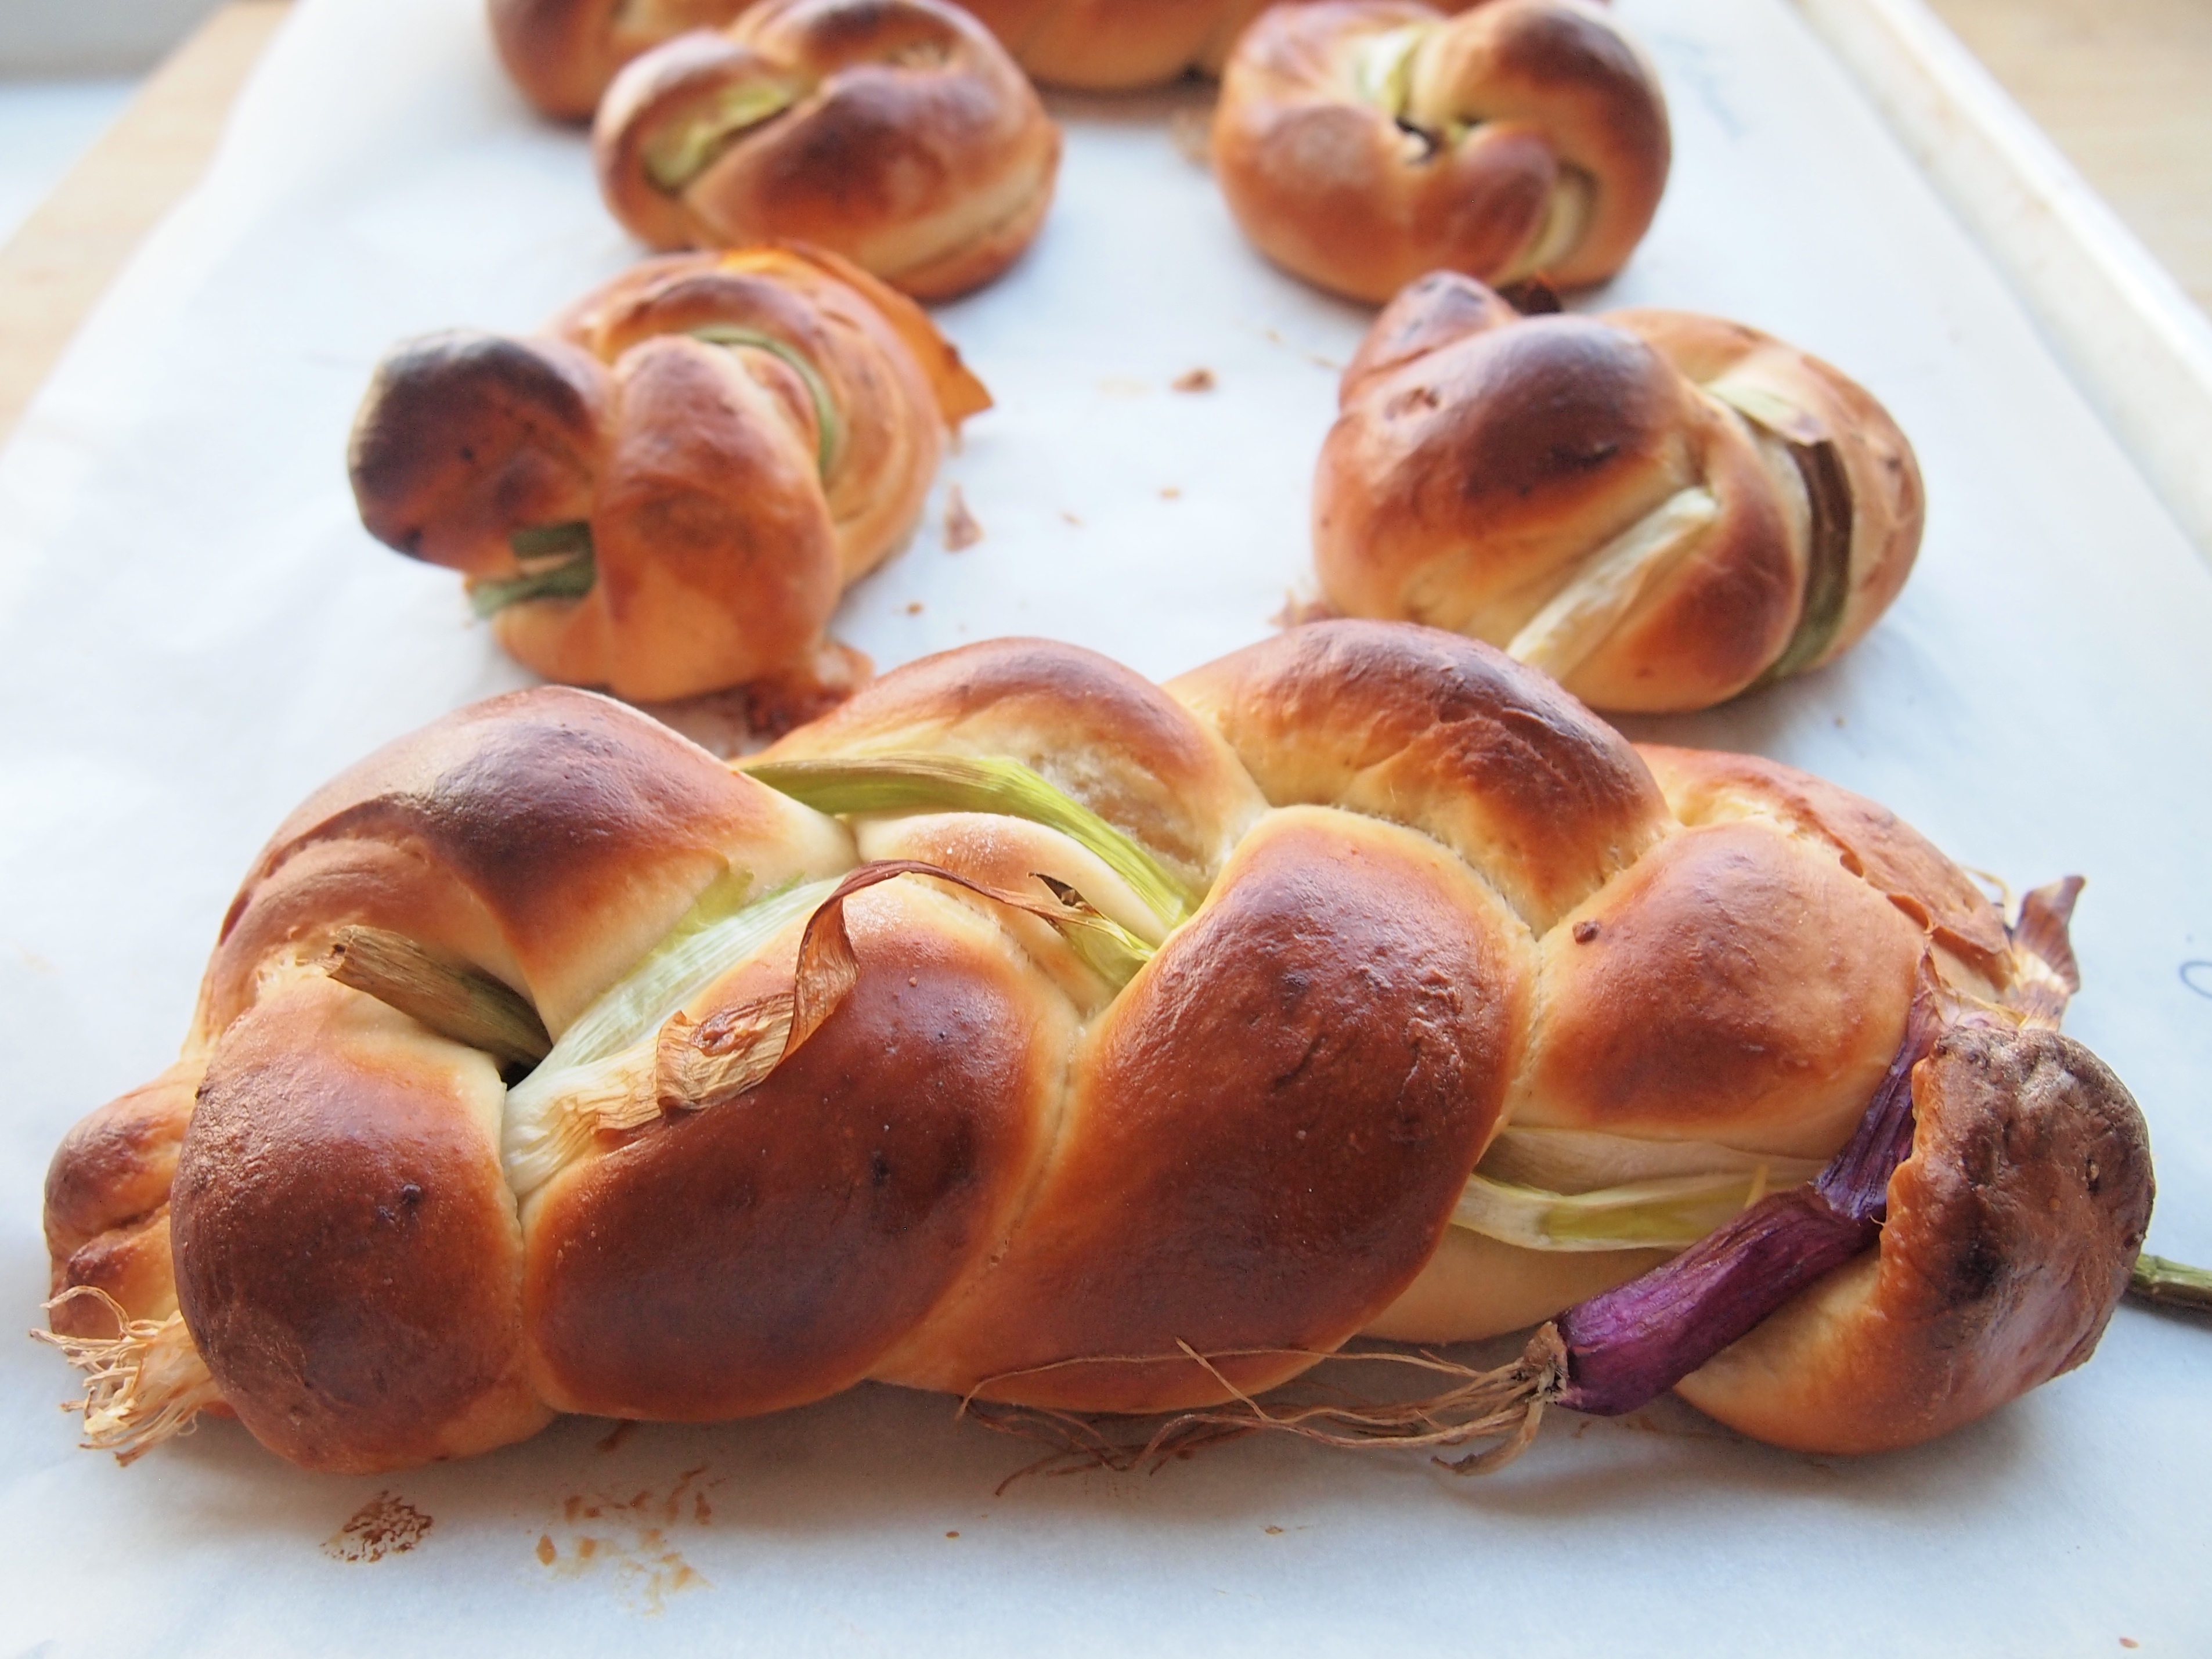
In his kitchen, at a stone-paved, wood-covered counter and against the soundtrack of chirping birds, Erez kneaded and rolled and braided challah, incorporating greens and herbs and roots and flowers plucked from his garden. Fittingly, he prepared two different versions – one stuffed with artichoke confit, studded with artichoke leaves and flowers and herbs, then showered in rose petals. I’ve photographed my version of the second type – infused with garlic oil, stuffed with garlic confit, and interwoven with root-to-stem strands of wild garlic, green onion, and scallions (he uses freshly dug entire garlic cloves, but I used what I was able to get at the greenmarket and grocery store).
Erez explained that moving to Mattat, just south of the Lebanese border, nearly two decades ago completely changed his life: “I improved my skills as a chef and baker because I live in nature, see seasons, grow my own vegetables.” He laments that baking has been slow to embrace the idea of cooking locally, seasonally, and with terroir. Adeena nicely summarizes that with challahs that come straight from the garden, Erez can bring the essence of nature and one’s surroundings into his bread. And, so could we.

The virtual audience peppered him with questions to which he and Adeena responded with equal parts technical culinary knowledge, commitment to season and locale, dry humor, and near-continuous laughter.
On the mechanics of challah baking, Erez advises:
… store your yeast in the freezer, it’ll last a year, more than a year, probably longer.
… use the highest protein flour you can find. In Israel there is specialized challah flour, ground from inner part of the kernel, that is less elastic so that when you open the challah (which is how Israelis refer to rolling out the strands), they don’t spring back. Bread flour is nearly as good, AP will suffice if that’s what you have.
… instead of whole wheat, try spelt, it’s nutty but not as coarse.
… add salt only after kneading dough for a few minutes because it slows yeast growth.
… after rolling out the strands, twist them to give them more strength.
… braid challah loosely to give it room to expand in the oven

But more fun are his dramatic responses that demonstrate his philosophy on food and life, tempered with an understanding that we each have our own reality and we can’t (unfortunately) all live in Erez’s world:
What if you can’t find fresh young garlic? If you can’t find fresh garlic, do not make garlic challah.
Can you use canned artichokes instead of fresh? No. Use what’s in season. You can use mushrooms if mushrooms are in season. If you have good tomatoes, you can roast the tomatoes. Onions, onion confit. You can do peas. You can do mushrooms. You can do chicken liver.
Do you make sweet challah? Yes, 100%! I love making sweet challah. Now is the season for apricots, so I make knoedel – marillinknoedel – an apricot dumpling. What about using jam? No, too sweet. Well, maybe you can use apricot jam. Or roast the apricots and then drain in a colander.

Is there a point in the process when you can freeze the challah dough, so you can bake it in the future? Freezing is good in Wyoming and for the wolves. Freezing challah, why do you have to freeze the challah? Make it fresh. I do not freeze challah. And I know, but really, you can freeze it any time you want.
How do you store challah, how do you keep it fresh? You eat it. You don’t store it. But, if you want some for tomorrow, if you have some extra, keep it in a paper bag or wrap it in a towel overnight.
What if you wanted to make smaller challot? Rolls even? Sure, you can do small, very small if you are obsessive. Go ahead if you have a lot of time because you’re still in quarantine…You can do very small, you can make even microscopic challah if you’d like.
Ahem, guilty:

And then there’s using baking to honor tradition and history.
What flavor will the rose petals add to the artichoke challah? Smell, and rose flowers do not have a lot of flavor. My grandmother used to make rose jam, so it’s memories here, and my family.

After leaving the loaves to rise, Erez and Adeena led us out to the garden. First stop is one of Erez’s several outdoor ovens: This was my first taboon. It’s straw and mud, like in Egypt, by our ancestors. We follow as they meander through the greenery, pausing to look at flowers, pull herbs, taste leaves, pick strawberries, sigh at the views.
Erez approaches some sunflowers: I also use sunflower leaves, and the sunflowers for baking. It’s very good, it’s kind of nose to tail baking. It’s something I don’t know why we’re not doing it. I use every part. Exhibit 1: his sunflower challah.
Adeena asks, how did you learn to grow these vegetables so well? I didn’t learn. I don’t do it so well. It’s trial and error. You just put down good earth. And give it a good compost, and a lot of sun and a lot of water.
I think Erez would appreciate the moniker that a new friend, Eve Sicular (bandleader of Isle of Klezbos and Metropolitan Klezmer) dubbed a photo of my challah: vilde challah*.
Vilde challah. So perfect.
Erez Komarovsky’s Wild Spring Challah
I’m not going to recreate Erez’s instructions here because they speak for themselves. Here is Erez’s challah recipe shared by the Jewish Food Society. If you scroll down a bit, you’ll find instructions for artichoke and garlic confits.
However, I do have to make a confession: I used Adeena’s challah recipe. Years ago, my father had lost a good amount of weight using the Diet Center meal plan; when asked by a friend whether he had added exercise to his regimen, he responded, “of course not, I didn’t want to add too many variables. I have no doubt that Erez’s base challah recipe is top notch, but as my father’s daughter, I stick with Adeena’s which has been a constant since receiving her cookbook last year. The confit and leaves and roots provided enough variables for me at one time.

* In Yiddish, vilde means wild, and vilde challah is a play on the phrase vilde chaya which translates to wild beast. It’s a term often used to describe a kid who is especially rambunctious. Maurice Sendak’s mother used to call him a vilde chaya, and he went on to write Where the Wild Things Are.


